National Laboratory for Collective Use

- Building No. 8 of S. Amanzholov East Kazakhstan State University Ust-Kamenogorsk city, st. Қ. Bitibayeva 18/1, cab. №12, 15
- Building No. 7 of S. Amanzholov East Kazakhstan State University Ust-Kamenogorsk city, st. Shakarim 148
- e-mail: nnlkp@mail.ru
About us
NSLCU was organized in 2009 in accordance to the order of the Ministry of Education and Science of the Republic of Kazakhstan No. 436 dated July 22, 2008 “On the definition of scientific organizations (universities)”, which sated the opening several National Scientific Laboratories for collective.
The laboratory is an accredited research center of collective use for the development of innovative technologies for engineering, energy, agriculture, chemical and processing industries, as well as for performing fundamental and applied research in various fields of science: materials science, physics, chemistry, ecology and biology.
The main goal of NSLCU is the creation of research, technological and engineering infrastructure for the development of science and technology, as well as ensuring the provision of open access for domestic and foreign scientists to the laboratory equipment for research and development work on priority areas of scientific and technological development,
The mission of the laboratory is to create a modern world-class research center that solves current scientific problems that contribute to the country’s innovative development.
MAIN PUBLICATIONS AND PATENTS OF EMPLOYEES
- Scopus
- Web of science
- KOKSNVO (KOKSON)
- Monographs
- Patents
List of National Scientific Laboratory of Collective Use (NSLCU) services:
- conducting research on X’Pert PRO X-ray diffractometer
- conducting research on the NMR spectrometer on Avance III 500MHz Bruker
- conducting research on X-ray fluorescence spectrometer SRV-1M
- conducting research on a transmission electron microscope EM-200
- conducting research on an optical microscope NEOPHOT-21
- conducting research on the FTIR-801 Simex IR spectrometer
- conducting research on atomic absorption spectrometers MGA-915 (electrothermal atomization) and SensAA GBC (flame atomization)
- carrying out studies using a liquid chromatograph “Lumachrome” with spectrophotometric and fluorimetric detectors;
- conducting research on the spectrophotometer PE-5400UF;
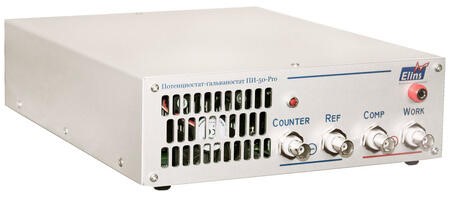
- research on potentiostat-galvanostat;
- testing on microhardness tester PMT-3
- testing on a thermogravimetric analyzer (TGA);
- obtaining powder materials from aqueous suspensions using a lyophilizer (freeze dryer) 18ND;
- testing on a universal testing machine WDW-E5
- development and manufacture of test benches and equipment for processing materials, machine parts;
- implementation of scientific guidance and support of the introduced technologies in the system of original and elite potato seed production;
- in-vitro cloning of potato varieties for the first nursery of original seed production;
- seed encapsulation before sowing using a polymer composite;
- production and modification of polymeric materials;
- heat treatment of steel and alloys in various media (atmosphere, vacuum and gaseous environment) using a Suol 0.4.4/12 tube furnace and an SNOL 30/1300 electric muffle furnace;
- carrying out mechanical tests of materials in a wide range of strain rates and temperatures, as well as in an inert gas environment;
- production of complex profile products using the X6436 universal milling machine and the CY1224 CNC milling machine
- turning-milling and welding works;
- design development and process modeling;
Staff

Akatan Kydyrmolla
E-mail: ahnur.hj@mail.ru, kidirmolla@gmail.com
Scopus Author ID: 57199328952
Web of Science ResearcherID: R-8274-2019
ORCID: https://orcid.org/0000-0002-3172-623X ;
GOOGLE SCHOLAR https://scholar.google.com/citations?hl=ru&user=WcvJ4vcAAAAJ
Main activities and scientific interests:
- polymer chemistry;
- nanocatalysts;
- NMR spectroscopy;
- polymer composite materials;
- carbon materials;
- nanomaterials
- composite materials based on biopolymers;
- composite materials based on graphene oxide/biopolymors, graphene oxide modified with metal nanoparticles

Zhilkashinova Almira Mikhailovna
– Leading Researcher, Candidate of Physical and Mathematical Sciences, Assoc. Professor
E-mail: almira_1981@mail.ru
Web of Science ResearcherID: GHF-3101-2022 <br. ORCID: https://orcid.org/0000-0002-1209-7335
Scopus Author ID 55890420000
Main activities and scientific interests:
- technologies, devices and materials for RES;
- ceramic composite materials.

Kuanyshbekov Tilek Kuanyshbekuly
Senior Researcher, Doctor of Philosophy (PhD), specialty 6D071000 – Materials Science and Technology of New Materials
- E-mail: kuanyshbekov_17@mail.ru
- Scopus Author ID: 57208187816
- Web of Science ResearcherID: AEV-3534-2022
- ORCID: https://orcid.org/0000-0002-2336-3678;
- GOOGLE SCHOLAR : https://scholar.google.com/citations?view_op=new_articles&hl=ru&imq=Kuanyshbekov+Tilek#).
Main activities and scientific interests:
- graphene nanostructures;
- carbon materials;
- nanomaterials;
- graphene oxide from graphite and activated carbon;
- composite materials based on graphene oxide and polymers;
- sensitive materials for humidity sensors based on graphene oxide;
- composite materials based on graphene oxide/biopolymors, graphene oxide modified with metal nanoparticles for agriculture.

Kantay Nurgamit
– Senior Researcher, Doctor of Philosophy (PhD) in the specialty 6D072300 - "Technical physics"
E-mail: nurgan85@mail.ru
Web of Science ResearcherID: CXT-3865-2022
ORCID: 0000-0002-5557-0081
Scopus Author ID: 56500555200
Main activities and scientific interests:
<br.- condensed state physics;
- polymeric composite materials;
- ceramic composite materials.

Nugumanova Aliya Bagdatovna
Старший научный сотрудник, доктор философии (PhD) по специальности информационных систем
- E-mail: yalisha.@yandex.kz
- Scopus Author ID: 55864815200
- Web of Science ResearcherID: L-9616-2015
- Publons
- ORCID: https://orcid.org/0000-0001-5522-4421;
- SCHOLAR.GOOGLE https://scholar.google.com/citations?user=4EocLgEAAAAJ&hl=ru.
Основные направления деятельности и научные интересы:
- информационный поиск;
- обработка естественного языка;
- интеллектуальный анализ данных.

Maulit Almasbek
E-mail: maulit.almas@gmail.com
Scopus Author ID: 57220810948
Web of Science ID: DFH-7960-2022
ORCID: https://orcid.org/0000-0002-0519-3222 ;
GOOGLE SCHOLAR: https://scholar.google.ru/citations?user=8RWAFrcAAAAJ&hl=ru
Main activities and scientific interests:
- natural language processing;
- predictive analytics;
- intellectual data analysis.

Baiburin Yerzhan Mukhametkalievish
E-mail: ebaiburin@gmail.com
Scopus ID: 56111999400
Web of Science ID: EMM-5734-2022
ORCID: https://orcid.org/0000-0002-1583-9912;
Main activities and scientific interests:
- information search;
- natural language processing;
- intellectual data analysis.

Ocheredko Igor Aleksandrovich
E-mail: egor007kz@mail.ru
Scopus ID: 57214718565
Web of Science ID: HLH-3766-2023
ORCID: https://orcid.org/0000-0001-8012-8589;
Main activities and scientific interests:
- Development and research of technologies for obtaining functional composite materials;
- Development of technologies for deposition of functional coatings;
- Modeling of technical systems by the finite element method;
- Anti-corrosion coatings;
- Renewable energy sources

Tuyakbayev Bauyrzhan Toleubekovich
E-mail: tu_baur1980@mail.ru
Scopus ID: 57457803200
Web of Science ID: CDK-5407-2022
ORCID: https://orcid.org/0000-0001-8920-2933
GOOGLE SCHOLAR: https://scholar.google.com/citations?hl=ru&user=ptAkz4kAAAAJ&view_op=list_works&gmla=ABEO0YrGr70dXuC2k1RxHUuEYQozBfc5sYtOAr2s5-GxJUlxIyUENdq1QBbTt0QqTVyn_OHzE6MXSrcGNONERAF-PjCtASqlYkAJrrQmUFwK7Q
Main activities and scientific interests: - study of nanostructural states of metals and alloys; - study of the physics of phase transformations in metals and alloys; - study of the structure and properties of welded compound; - radiation modification of material surfaces in order to improve their operational properties; - renewable energy; - development of new installations for applying protective coatings on metals and alloys.

Nikolayeva Valentina Nikolayevna
E-mail: vn_nikolaeva@mail.ru
Scopus ID: 57222575514
ORCID: https://orcid.org/0000-0001-8887-7111;
Main activities and scientific interests:
- micropropagation of rehabilitated crops;
- micropropagation of rehabilitated crops;
- phytological examination of plant seed material;
- immunobiotechnological analysis of plants;
- biology and biotechnology of plants;
- original and elite potato seed production;
- improvement of fruit and berry crops based on micropropagation of plants in vitro.

Dolanbayeva Gulsaiyn
- E-mail: gulsaiyndolanbayeva@gmail.com
- Scopus ID: 57222570410
- Web of Science ID: HKM-7472-2023
- ORCID: https://orcid.org/0000-0002-0049-1511
Main activities and scientific interests:
-biology and biotechnology of plants;
-original and elite potato seed production;
-improvement of fruit and berry crops based on micropropagation of plants in vitro;
-mycological study of agricultural varieties;
-introduction of soybean varieties into in vitro and rehabilitation by the apical meristem method;
-micropropagation of potato varieties in vitro;
-phytopathology of cultivated plants;
-selection of new methods for effective sterilization and disinfection of explants and nutrient medium in the working culture in vitro.

Bogdanova Xeniya Olegovna
– E-mail: noda-98@mail.ru
– Scopus ID: 57638427900
– Web of Science ID: HDN-5121-2022
– ORCID: https://orcid.org/0000-0001-9318-6155;
Main activities and scientific interests:
Biology and biotechnology of plants;
Original and elite potato seed production;
Micropropagation of potatoes in vitro
Mycological studies of agricultural plants;
Selection of new methods for effective sterilization and disinfection of explants and nutrient medium in the working culture in vitro;
Electrophoretic studies of plants;
Study of the influence of the number of growth simulants in nutrient media on the cultivation of medicinal plants in vitro and in vivo;
Propagation of houseplants succulents.
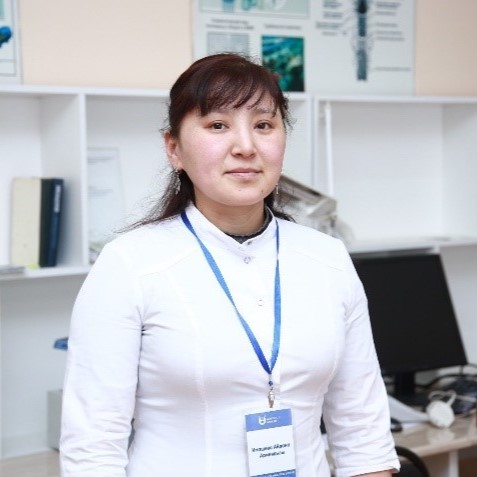
Imasheva Aidana
E-mail: aidanaimash16@mail.ru
Scopus ID: 57224504117
ORCID: https://orcid.org/0000-0001-9779-2013 ;
Main activities and scientific interests:
development of polymer composite materials;
studying the structure of organic substances by NMR and IR spectroscopy;
nanocatalysts;
organic synthesis.
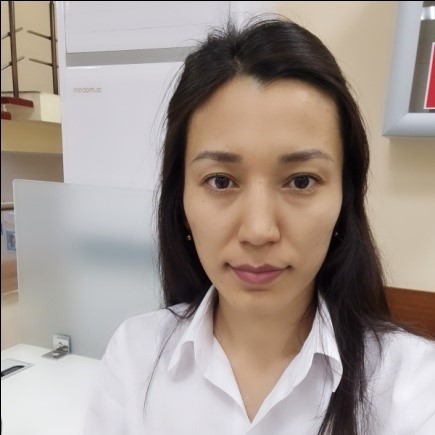
Battalova Ainur Kumarbekovna
E-mail: 2012kausar@mail.ru
Scopus ID: 57224504117
ORCID: https://orcid.org/0000-0003-0002-5665
Main activities and scientific interests:
- biodegradable composite materials based on natural polymers.

Vnorovskaya Yelena Vladimirovna
E-mail: yaroslavceva_elena@mail.ru
Main activities and scientific interests:
-Analytical chemistry;
-Physico-chemical methods of analysis in the control of environmental pollution.

Zhanimkhan Perassyl
E-mail: asil-kazakh@mail.ru
Main activities and scientific interests:
- startup projects;
- project to create a verticalizer;
- help for children, cerebral palsy (CP);
- laser machine;
- milling machine;
- programming.

Kaiyrbekov Nariman Ruslanuly
E-mail: narimankayrbekov@gmail.com
ORCID: https://orcid.org/0000-0003-2408-5005;
GOOGLE SCHOLAR: https://scholar.google.com/citations?user=ptIzTCQAAAAJ&hl=ru&authuser=1
Main activities and scientific interests:
- carbon materials;
- nanomaterials;
- graphene oxide from graphite and activated carbon;
- composite materials based on graphene oxide and polymers;
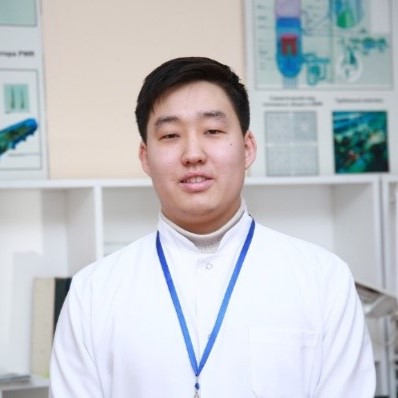
Sagdollin Zhandos Rashiduly
E-mail: Zhandossagdollin@gmail.com
ORCID: https://orcid.org/0000-0001-6389-6826;
SCHOLAR.GOOGLE https://scholar.google.com/citations?hl=ru&user=fKom8dIAAAAJ ).
Main activities and scientific interests:
- carbon materials;
- nanomaterials;
- graphene oxide from graphite and activated carbon;
- composite materials based on graphene oxide and polymers;

Zhomartkan Nurassyl Kairatuly
Engineer, bachelor 5B060500-Nuclear physics
E-mail: zhomartkan.kz@mail.ru
Main activities and scientific interests:
- precision farming;
- predictive analytics;
- data mining.
EQUIPMENT
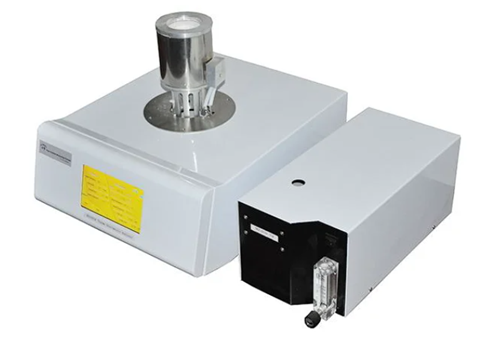
Purpose: thermogravimetric analyzer (TGA) is in the TG, temperature, temperature or cooling mode, observes the quality with temperature or time change, the purpose is to study the thermal stability of the material and components. Widely used in the fields of plastics, rubber, coatings, drugs, catalysts, inorganic materials, metal materials and composites, research and development, process optimization and quality control. Measurement and research materials have the following characteristics: heat resistance, decomposition process, adsorption and desorption, oxidation and reduction, quantitative analysis of ingredients, influence of additives and fillers, moisture and volatile substances, reaction kinetics.
Specifications:
– temperature range from room temperature to ~ 1150 C°;
– temperature resolution 0.1 C°;
– temperature fluctuations ± 0.1 C°;
– heating rate 1~80 C°/min;
– temperature control mode: heating, cooling, constant temperature;
– Cooling time: 15 minutes (1000 C°~100 C°);
– weight measurement range 1mg ~ 2g;
– weight resolution 0.01 mg;
– atmosphere inert, oxidizing, recoverable, static and dynamic;
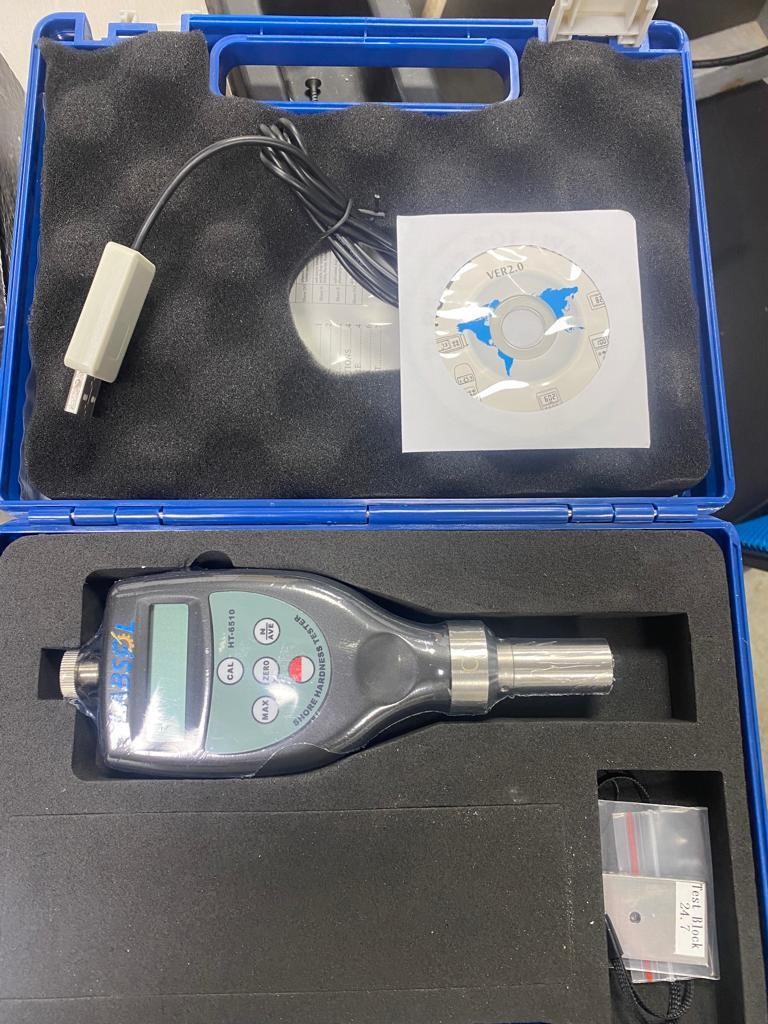
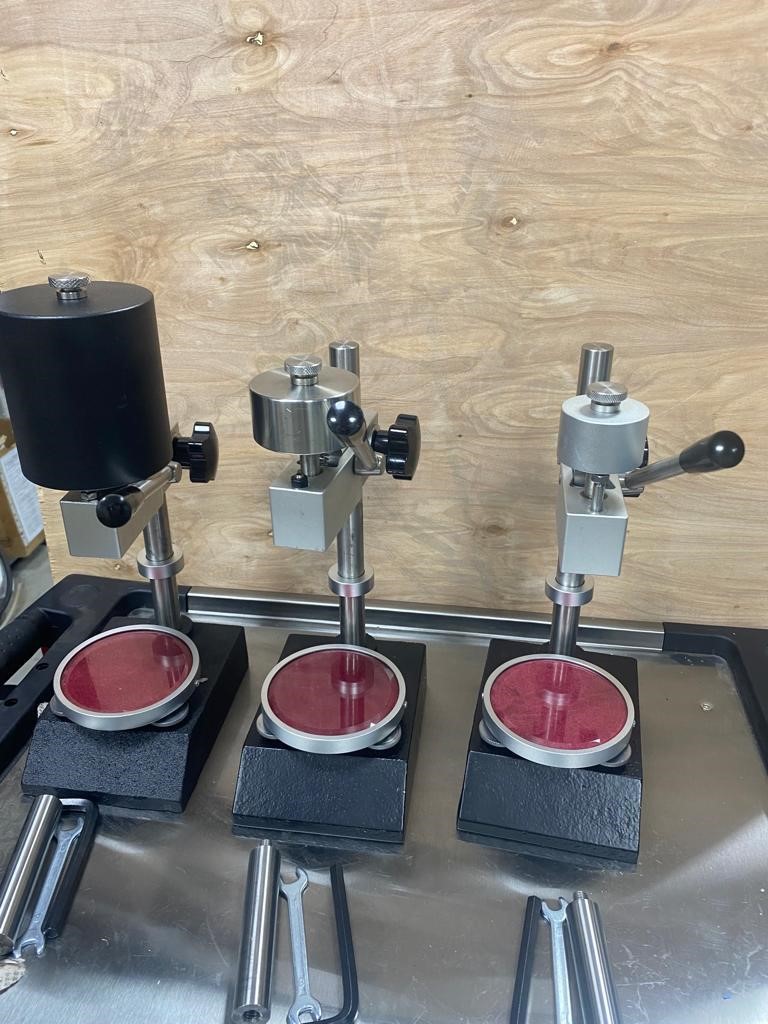
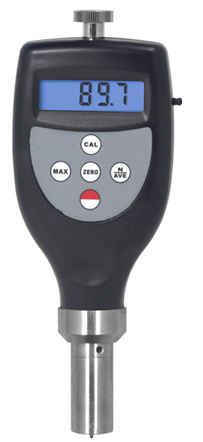
Purpose: The hardness tester (durometer) is used to determine the indentation hardness of materials from cellular products to rigid plastics in laboratory rooms at a temperature of (23±5) 0С and relative humidity (65±15) %. The indenter of the device is pressed into the material under the action of a spring with a fixed force, and the hardness value is displayed on the dial in units of Shore hardness. The device can be used both separately and mounted on an optional tripod, which increases the repeatability of measurement results. The range of Shore hardness testers (durometers) includes several models with different measurement ranges.
Specifications:
– scale measurement range, units of hardness according to Shore (HA) from 0 to 100 H;
– test range of ND measurement from 10 to 90 H;
– resolution: 0.1 H;
– measurement deviation: ≤ ± 1H.
The range of Shore hardness testers (durometers) includes several models with different measurement ranges.
| Model | Specification |
А
| Truncated Cone: R=0.79mm, 35º±1/4º Designed to test the following materials: soft rubber, elastomers, natural rubber products, neoprene, resins, polyester, soft PVC, foam, etc. |
| C | Truncated cone: R=0.79 mm, 35 º±1/4 º Suitable for testing the following materials: plastics and rubber materials of medium hardness |
D
| Cone: R=0.1mm, 30º±1/2º Designed to test the following materials: fiber, hard rubber, hard plastic materials, plexiglass, rigid thermoplastics, printing roller, vinyl plate, cellulose acetate, etc. |
DO
| R 1.2 spherical radius Plastics and materials of medium hardness to hard rubber |
| OO | R 1.2 spherical radius Sponge and cellular rubber, foam rubber, silicone, gel materials |
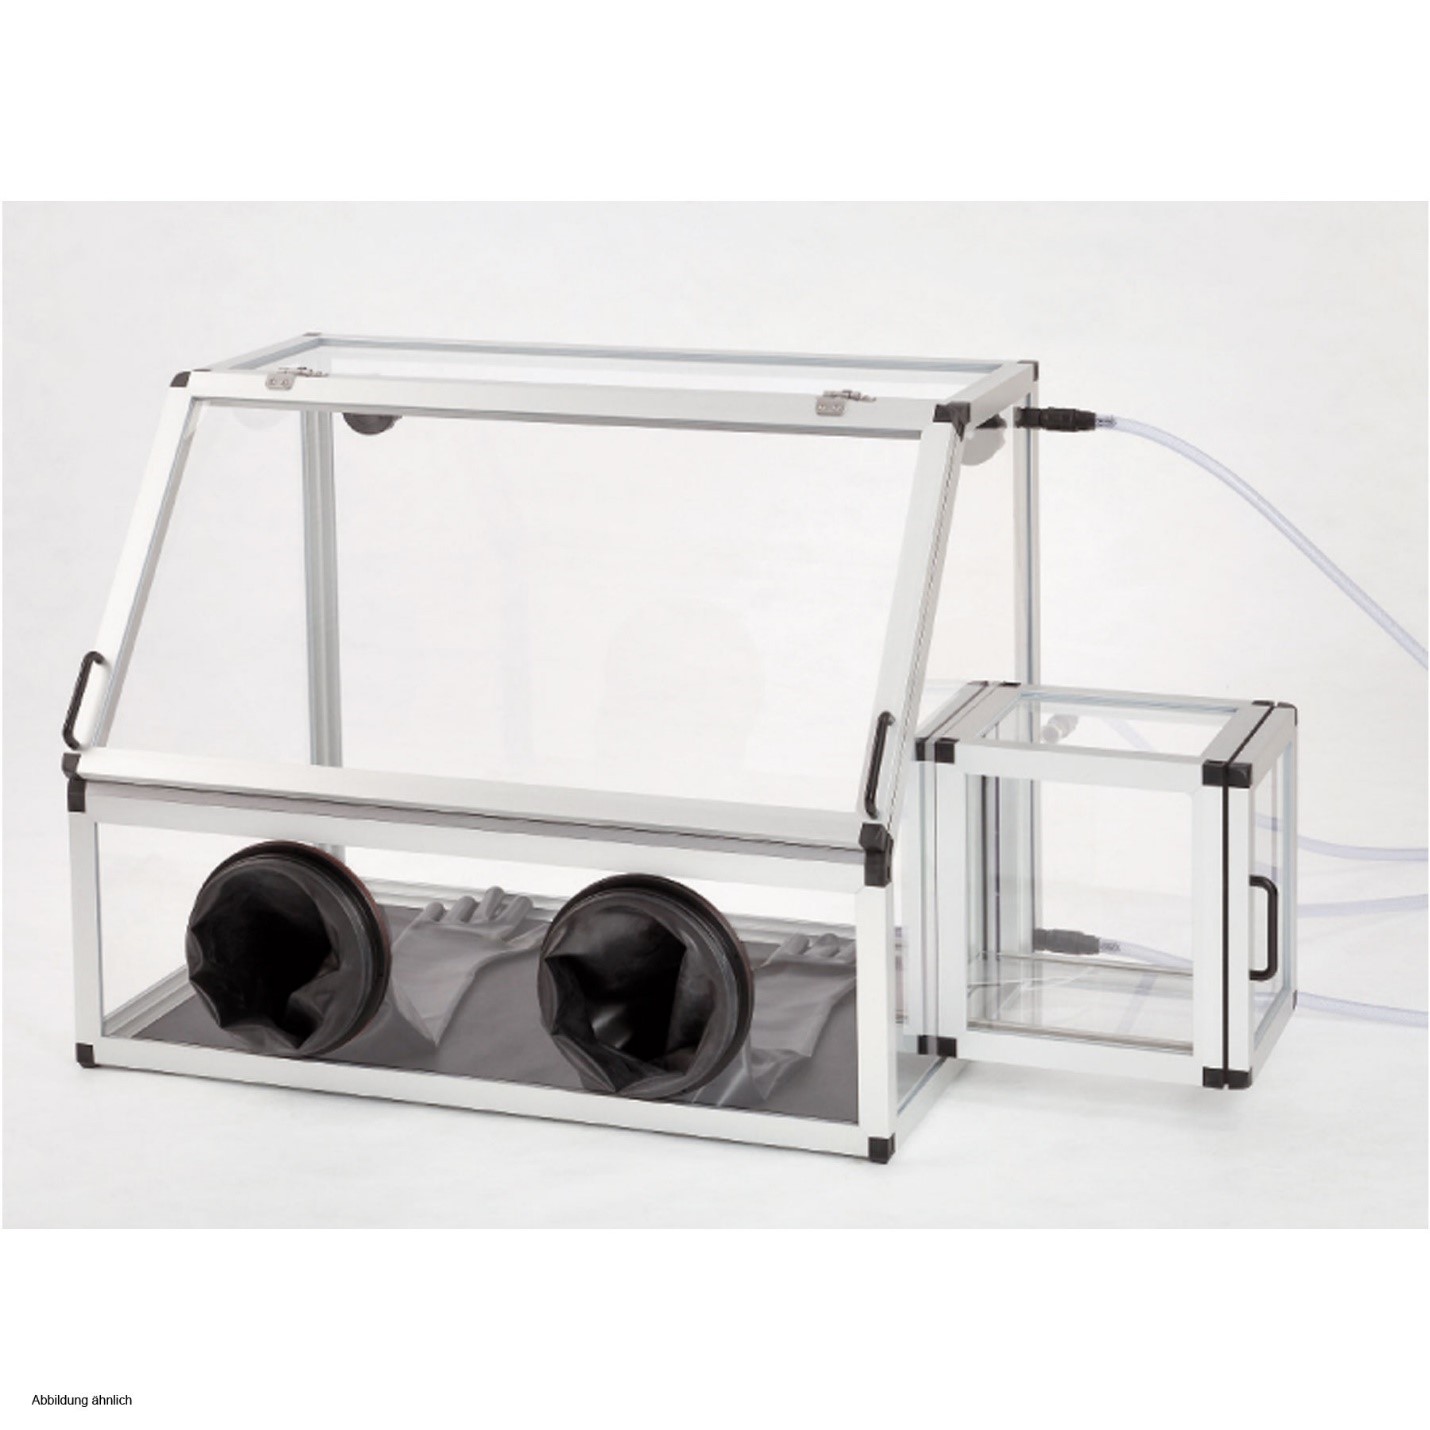
Purpose: a sealed container that is designed to manipulate objects in a separate controlled atmosphere. Gloves are built into the sides of the glove box, positioned so that the user can put their hands in them and perform work inside the box without breaking the protective shell. Part or all of the box is usually transparent. There are two types of glove boxes. The first allows a person to work with dangerous substances such as radioactive materials or infectious agents, and the second allows the manipulation of substances that must be contained in a very high purity inert atmosphere, such as argon or nitrogen. It is also possible to use a glovebox for handling items in the vacuum chamber.
Specifications:
- boxing material is acrylic.
- pressure gauge on the lock chamber: 1 set
- (-0.1mpa ~ 0.1mpa showing range)
- size of the main chamber 700 l x 300 w x 300 h mm
- lock chamber size 210 l x 210 w x 210 h mm
- main chamber thickness 5 mm
- humidity controller from 15% to 85% with temperature sensor. humidity is created from 25% to 75% in no more than 540 seconds.
- Board supply voltage 220V 50Hz
- transparent material thickness 8 mm.
- standard gloves
- rubber gloves 600 mm long
- with the help of electrodes it is possible to fix sintered samples (polymers).
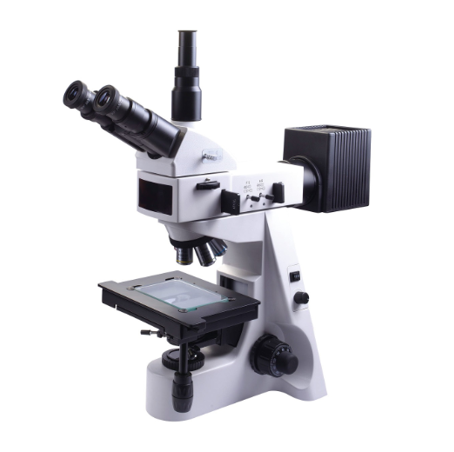
Purpose: This equipment can be used in the observation, analysis and research of metallurgy, minerals, crystals, microelectronics, and is the best choice for factories, universities, research institutes and electronic industries. This xjp-146jbt microscope for 1000 nm adopts 2 kinds of reflection and transmission illumination, and is equipped with Epi-illuminated polarizing devices. Bright fields and polarization observations can pass under the reflected light. Stable, high-quality optical systems meet your high image quality requirements, square body is more rigid, T-shaped design gives you a more stable base. Humanized configuration design and convenient operation, let you free yourself from the pressure of hard work.
Specifications:
- viewing head: trinocular head without tilt compensation 30° (55mm-75mm);
- eyepiece: wf10×/22mm; wf10×/20mm, crosshair with 0.1mm grid;
- tip: four spindle nosepiece;
- lenses: infinity 4×/0.1w.d.29.4mm; plan metallurgical 10×/0.25w.d.16mm, 20×/0.4w.d.10.6mm; objective 40×/0.6w.d.5.4mm;
- object table: two-layer mechanical; dimensions (180mm×150mm); travel range (75mm×50mm);
- focusing: coaxial coarse and fine focusing; with rack and gear mechanism; fine focus value 0.002 mm;
- inspection tool: 0.01mm micrometer
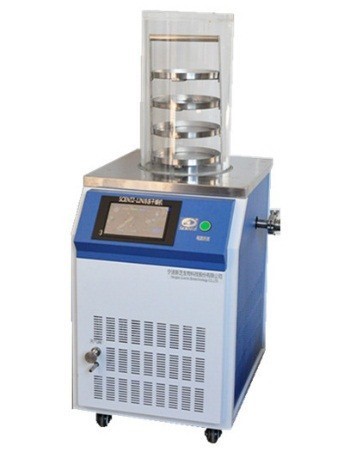
Purpose: freeze drying is a method of soft drying of substances, in which, before drying, the substance in the liquid composition is subjected to deep freezing (temperature from -50 ° C to -105 ° C), and then placed in a chamber, where, under the action of vacuum and low temperature, the frozen solvent is removed (sublimation). Vacuum freeze drying technology, also called freeze-drying, is a technical method in which samples are pre-frozen and then their moisture is sublimated in a vacuum state. Goods are easier to store for a long time after being freeze-dried. They can be restored to their original state and retain their chemical and biological characteristics after watering. Therefore, freeze drying technology is widely used in medicine, food, chemical industry, biological products, etc.
Specifications:
- cold trap coil temperature: -56℃ (no load), optional -80℃ (no load);
- ultimate vacuum: less than 5 Pa (empty);
- pumping speed: 2 L/s;
- water-catching capacity: 3-4 kg/24 hours;
- cooling mode: air-cooled;
- defrost mode: natural cream;
- drying power: normal function: sample plate 4, disk diameter φ200mm, can hold 1200ml sample (material thickness 10mm);
- optional feature of the 6-layer sample tray. The disc diameter is φ200mm and can accommodate 1800ml sample (material thickness 10mm);
- coating function: sample disc diameter fi 180mm, three layers in total, can accommodate 800ml sample (material thickness 10mm).
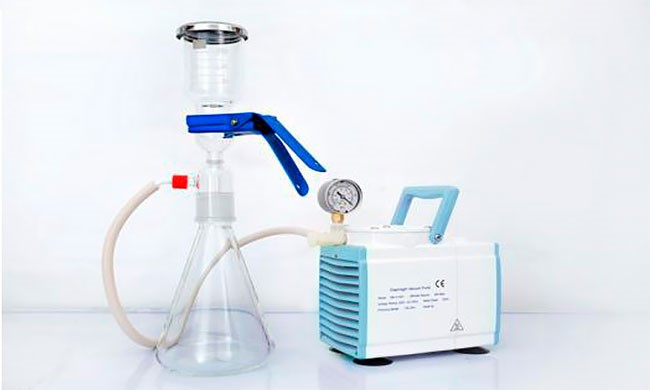
Purpose: vacuum filtration device is designed for:
- vacuum filtration of drinking water samples during sanitary and microbiological analyzes in accordance with: GOST 18963-73 “Drinking water. Methods of sanitary and bacteriological analysis”; SanPiN 2.1.4.1074-01 “Drinking water. Hygienic requirements for the quality of water in centralized drinking water supply systems. Quality control”; SanPiN 2.1.4.1116-02 “Drinking water. Hygienic requirements for the quality of water packaged in containers. Quality control”; MUK 4.2.1018-01 “Methods of sanitary and microbiological analysis of drinking water”.
- fine filtration of water during physicochemical laboratory and research work;
- microbiological research in food, medical, pharmaceutical and other industries;
- analysis of liquid oils, fuels and other liquids that are not aggressive to the material of the filter cell, contaminated with solid particles;
- obtaining a graphene oxide membrane, composite materials from a liquid suspension.
Specifications:
- 300 ml filter cell with stainless steel funnels; membrane filter diameter, mm 35;
- vacuum membrane pump NVM-0.33II; vacuum, kgf/cm2 up to -0.8, productivity, l/min 20;
- receiver (Bunsen flask) with a volume of 2500 or 5000 ml with a silicone stopper;
- filter-moisture separator FVG-022 with polytetrafluoroethylene membrane 0.2 µm and diameter, mm 65;
- set of pipelines.
Purpose:
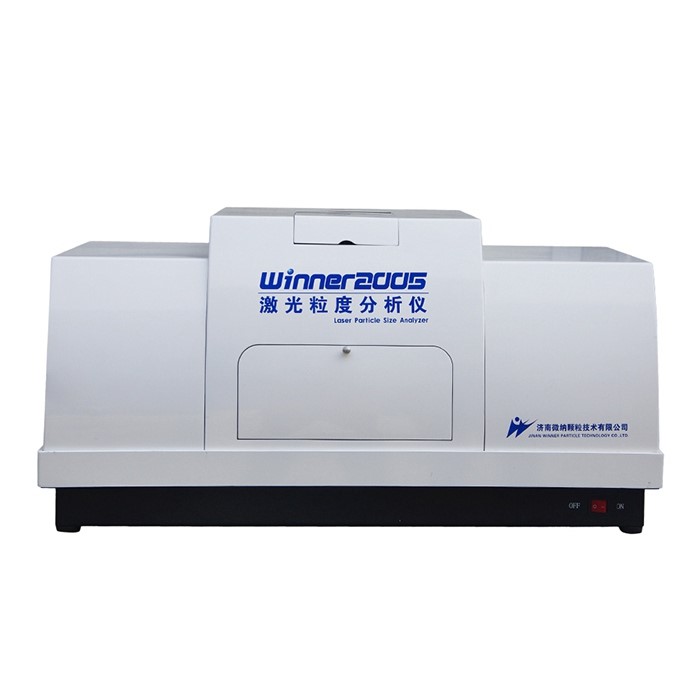
Winner2005 intelligent fully automatic laser diffraction particle size analyzer with Mie scattering principle for accurate determination of particle size distribution from 0 µm to 1000 µm. This allows you to have a good understanding of materials such as abrasives, adhesives, agrochemicals, barite, batteries, bentonite, boron carbide, brucite, bubbles, calcite, calcium carbonate, carbon black, catalysts, cement, ceramics, chemicals, clay, coal, coatings, Corundum, Cosmetics, Diamond powder, Dolomite, Diatomite, Emulsion, Environment, Explosives, Ferrite, Flour, Fluorescent, Fluorite, Food and drink, Dietary supplement, Graphite, Grinding, Ink, Kaolin, Medicine, Metal powder, Mica, Milling , Minerals, Oxides, Paints, Paper, Petrochemicals, Pharmaceuticals, Pigments, Gypsum, Plastics, Polymers, Quartz, Refractories, Resins, Silica, slurry, Soil deposits, Starch, Sulfur, Synthetics, Talc, Toners, Tourmaline, Wollastonite, Zeolite, Zirconium silicate, etc. and so on. Industry.
Specifications:
– size range 0.01–1000 µm;
– 90 photodetectors;
– accuracy error <1% (deviation D50 on the national standard sample);
– laser high-performance helium-neon laser λ= 632.8 nm, p>2 mW, service life>25000 hours;
– Testing speed <2 min/time (including all procedures) fastest measurement time <10 s;
– Operating temperature 15℃-35℃.
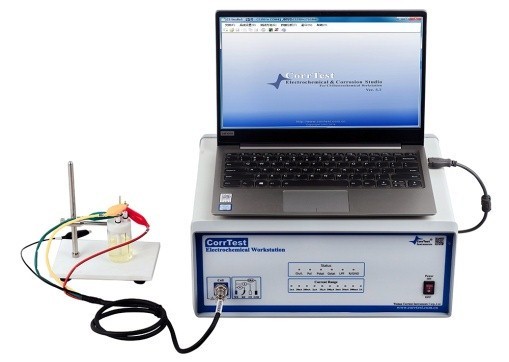
Purpose: The electrochemical workstation CS (potentiostat/galvanostat) contains a fast digital function generator, a high-speed data acquisition circuit, a potentiostat and a galvanostat. With high stability and accuracy, using advanced hardware and well-functioning software, it is a comprehensive research platform for corrosion, battery, electrochemical analysis, sensors, life sciences and environmental chemistry, etc. Applications: (1) The reaction mechanism of electrosynthesis, electrodeposition (electroplating), anodic oxidation, etc. (2) electrochemical analysis and sensor; (3) New energy materials (lithium ion battery, solar cell, fuel cell, super capacitors), advanced functional materials, photoelectronic materials; (4) study of corrosion of metals in water, concrete, soil, etc.; (5) Rapid assessment of the effectiveness of corrosion inhibitor, water stabilizer, coating and cathodic protection.
Specifications:
Support | for 2-, 3- or 4-electrode system |
Potential regulation range: | ±10 В |
Current adjustment range: | ±2 А |
Potential control accuracy: | 0.1% × full range ± 1mV |
Current control accuracy: | 0,1% × full range |
Potential resolution: | 10 µV (> 100 Hz), 3 µV (<10 Hz) |
Current sensitivity: | 1 pA |
Rise time: | <1μs (<10mA), <10μs (<2A) |
Reference electrode input impedance: | 10 12 Ohm || 20 pF |
Current range: | 2nA ~ 2A, 10 ranges |
Compliance voltage: | ±21V |
Potential and Current Range: | Automatic |
Maximum output current: | 2,0 A |
Scan CV and LSV: | 0.001mV ~ 10000V/s |
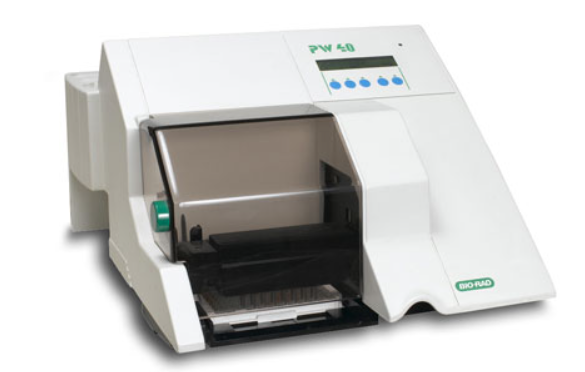
Purpose: Microplate washer “Mikroplate Washer 85499” – 8-channel washing device / aspirator for microplates with built-in vacuum and dosing pumps. Designed for use with 96-well concave or conical bottom plates. The height of the flushing and purge heads is adjustable, the possibility of vertical and horizontal positioning of the needle in the hole (accuracy 0.1 mm). Liquid level sensors on the flush and drain bottles and a vacuum gauge ensure consistent flush/purge processes.
Specifications:
Washing head | 8 channels |
Vacuum pump | Productivity 8 L/min |
Bottle volume | 2 L |
User interface | 2×20 display, 5 function keys |
Voltage | 240 V/100 VA, 50/60 Hz |
Power | 100W (max) |
Dimensions, mm | 551 x 530 x 300 |
Weight, kg | 11 |
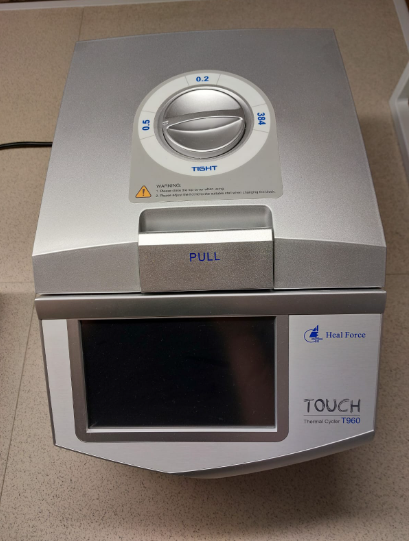
Purpose: This device is used for DNA amplification by polymerase chain reaction. The device provides periodic cooling and heating of test tubes in the temperature range of 0°C ~ 99.9°C with an accuracy of ≤ ±0.1°C, allows you to set the desired number of cycles and select the optimal time and temperature parameters for each cycle procedure (the maximum number of cycles is 999 ).
Specifications:
Block Formats | 96×0.2 mL(A), 54×0.5 mL(B), 96×0.2 mL+77×05 mL(C), 384 wells(D) |
Temperature range | 0℃~99,9℃ |
Display interface | 7’ЖК |
Maximum heating rate | 5,0℃/с |
Maximum cooling rate | 5,0℃/с |
Adjustable heating/cooling speed | 0,1℃/с~4,0℃/с |
Temperature stability | ≤ ± 0,2 ℃ |
Accuracy | ≤ ± 0,1 ℃ |
Gradient temperature range | 30~99℃ |
Gradient temperature range | 1~30℃ |
Gradient Uniformity | ≤0,2 ℃ (one row) |
Hot lid temperature | 20~110℃ |
Memory | 2000 |
Max. number of cycles | 999 |
Communication | USB2.0/RS 232/RJ45 |
Intelligent Diagnostics | 108 |
Size(W×D×H, mm) | 380×270×250 |
Weight, (kg) | 8.1 |
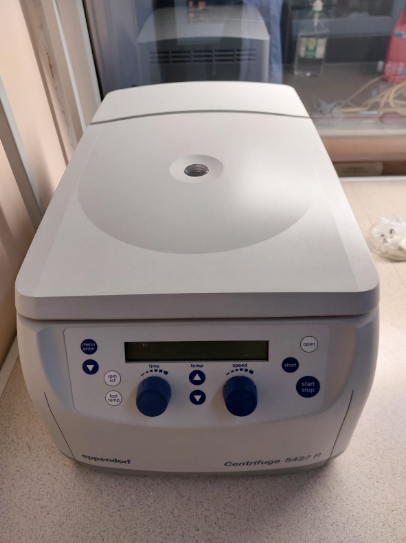
Purpose: This device is intended exclusively for indoor use and for the separation of aqueous solutions and suspensions of different density in the test tubes intended for this purpose. The device has the following characteristics: rotor capacity: 48×1.5/2 ml, 12×5.0 mL; The Eppendorf QuickLock® rotor ensures easy and convenient closing of the lid. Max. speed: 25,000×g (16,220 rpm). The large capacity of the rotor (48 places) significantly increases productivity and saves your valuable time. Convenient touch-closing lid for ergonomic work. Temperature range from -11°C to 40°C. FastTemp function for quick pre-cooling of the centrifuge, for example from ~23°C to 4°C in just 11 minutes. The ECO power off function can be activated after 1, 2, 4 or 8 hours of inactivity to minimize energy consumption and extend compressor life. Built-in condensate drain prevents water accumulation. Automatic detection of rotor and unbalance guarantees maximum work safety.
Specifications:
Rotor capacity | 8 x 1.5/2.0 ml, 12 x 5.0 ml |
Max speed | 25,000 × g (16,220 rpm) |
Temperature range | -10 °C to +40 °C |
Available rotors | 9 |
Acceleration time | 18 s |
Deceleration time | 18 s |
Timer | from 10 s to 9:59 h |
Noise level | < 46 dB(A) with rotor F-45-48-11 |
Dimensions | 319×540×254mm |
Weight without accessories | 30 kg |
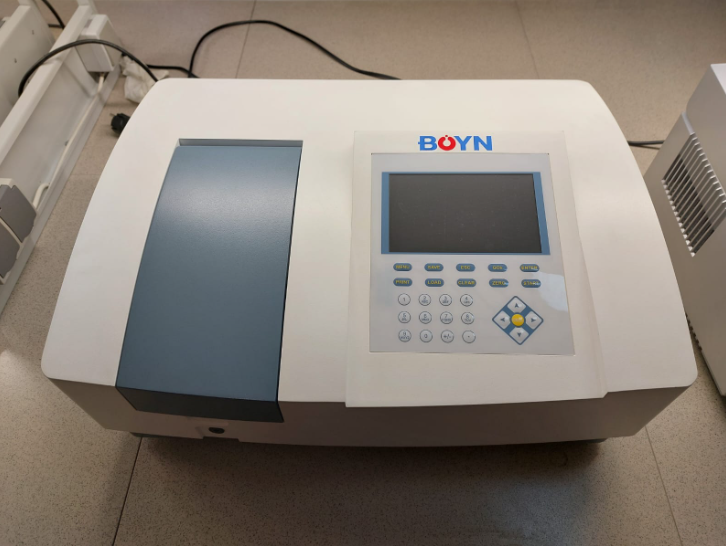
Purpose: This device is used to measure the color of solid surfaces and liquid substances by spectral analysis. The instrument provides specific spectrum parameters with wavelength accuracy ≤ ±0.3 nm, wavelength repeatability ≤ ±0.1 nm, photometric accuracy ±0.3%T in the range 0-200%T with automatic wavelength setting.
Specifications:
Wavelength range, nm – 325-1000;
Wavelength setting error, nm – ±2;
Reproducibility of setting the wavelength, nm – <1.0;
Spectral slit width, nm – 4;
Range of change: v optical density, A – -0.3-3.0;
V transmittance, % – 0-200;
Measurement error Т, % – ±0.5;
Scattered light at 340 nm, %T – <0.3;
Optical design – single beam;
Radiation source – halogen lamp;
Standard measurements, kinetics;
Manual setting of the wavelength;
Cuvette holder – universal 3 position, for cuvettes up to 24 mm wide, 5-100 mm long;
Possibility of placing cuvettes in a checkerboard pattern without deterioration of metrological characteristics;
Ability to measure optical density in vials and test tubes;
USB interface;
Data output and processing on a PC;
Dimensions, WxDxH, mm – 320x440x175;
Weight, kg – 8.5.


